Here's the "sitch": You have a digital image that you photographed on a very hazy day and it's so washed out, you can barely see what it was that made you point your camera in that direction. It's amazing what the camera can capture, and Photoshop can recover, using its Image-Adjustments-Levels menu.
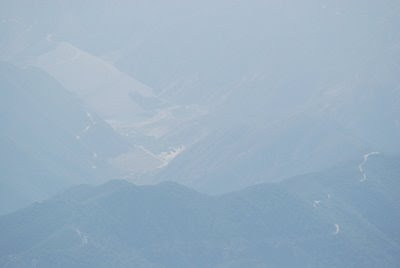
The photo below is of the Seven Oaks Dam in East Highland, Calif., taken from several miles away on the San Bernardino Peak Trail. It was so hazy, my lens couldn't find an edge sharp enough to auto-focus on. A throw-away image, right? Not quite. (Click on these images to view full size.)

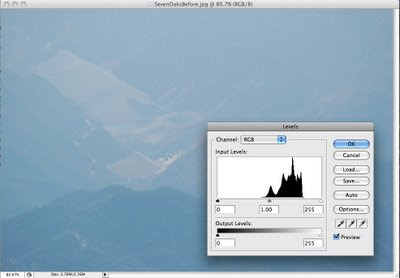
Opening the Levels dialog box displays the image's histogram (photo below), which is a graphic representation of its tonal range. In this case, both the highlight and shadow regions of the image are "blown out" -- there is no detail in those areas. Notice the big gaps between the highlight and shadow end points and where there is density in the image (represented by the graph in the center):

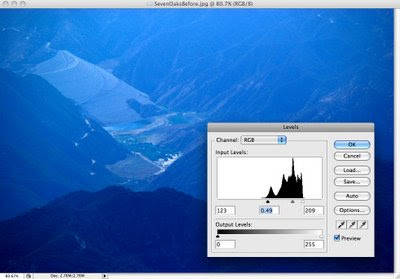
Grabbing the end points for the highlight and shadow values and dragging them to the area where the curve shows some density will eliminate much of the "noise" and reveal the detail you need:

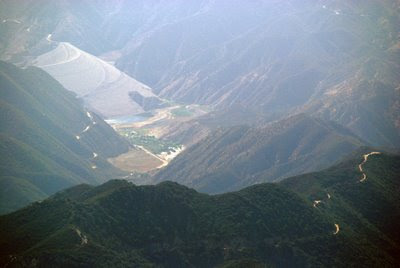
Of course, the resulting color is not true, so you will need to do additional manipulation. Because I have trouble seeing accurate color, I opted for Photoshop's Auto Color adjustment, which did the trick. While it's still not a great shot, it allows me to demonstrate to my friend Phil Richards that there is no lake behind the dam, as he contends. It looks more like a puddle.

Using Auto Color won't work in all cases, nor will the use of Levels in the manner described above. Moving the slider for the mid-tone value can help, too. If you want to explore more options, venture into manipulating Curves. The possibilities are nearly endless. There are a lot of in-depth tutorials on how to manage histograms, but this is a quick way to make a really bad shot look better.
No comments:
Post a Comment